
When Momofuku first opened up their restaurant, I dragged my then boyfriend (now hubby) there. I had to try their ramen noodles that New York Magazine stated was the best. A few years later, Milk Bar opened. A couple of years after that – their cookbook came out. Even though Milk Bar has expanded to multiple locations throughout the year, it is still never where I am or I forget there is a location where I am. I originally had this cake at a bridal shower for a friend. After eating it, I could not wait to make it myself to share.
So off to Amazon I went to order some materials that I needed. You will need a 6 inch cake ring and cake collars. After seeing the price of cake collars, I did a little investigating. Apparently, cake collars are transparencies from the overhead projector that was used when I was in school. I ordered a few of those and cut them to size.
It is best to break up this project into three days.
Day 1: Make the cake and cake crumbs
Day 2: Make the frosting, the soak, and clean out your freezer. Then, assemble the cake. Place cake in freezer.
Day 3: Take out cake from freezer. Take off cake ring. Defrost in fridge for at least three hours. Eat the cake
From the Momofuku Milk Bar website
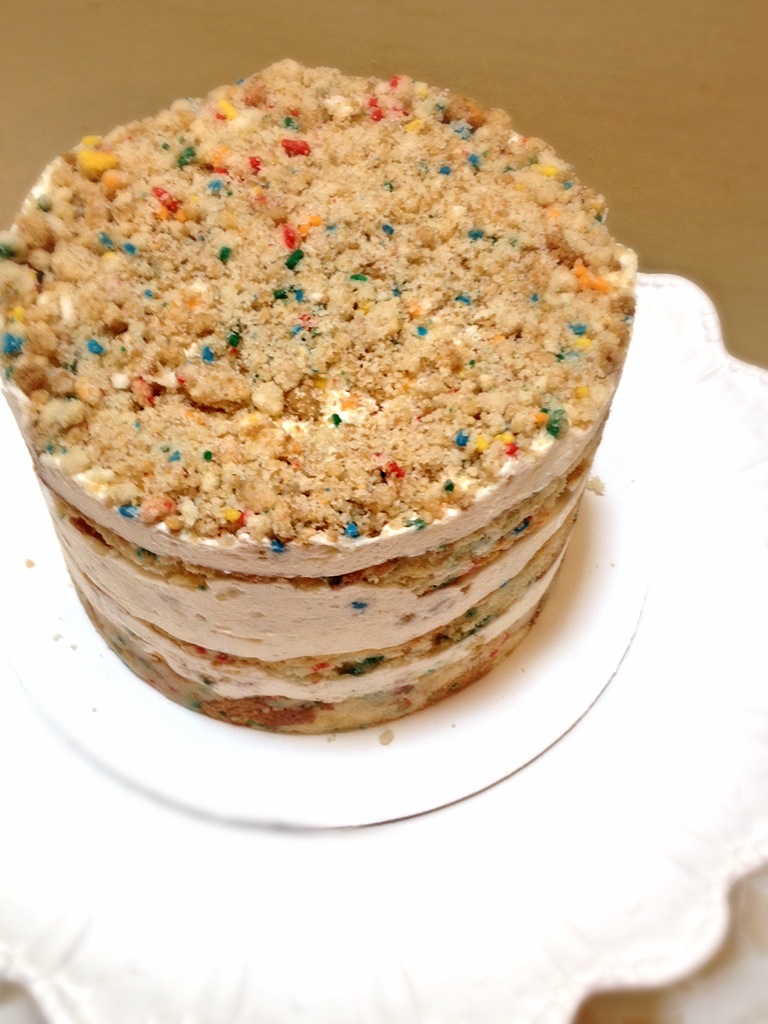
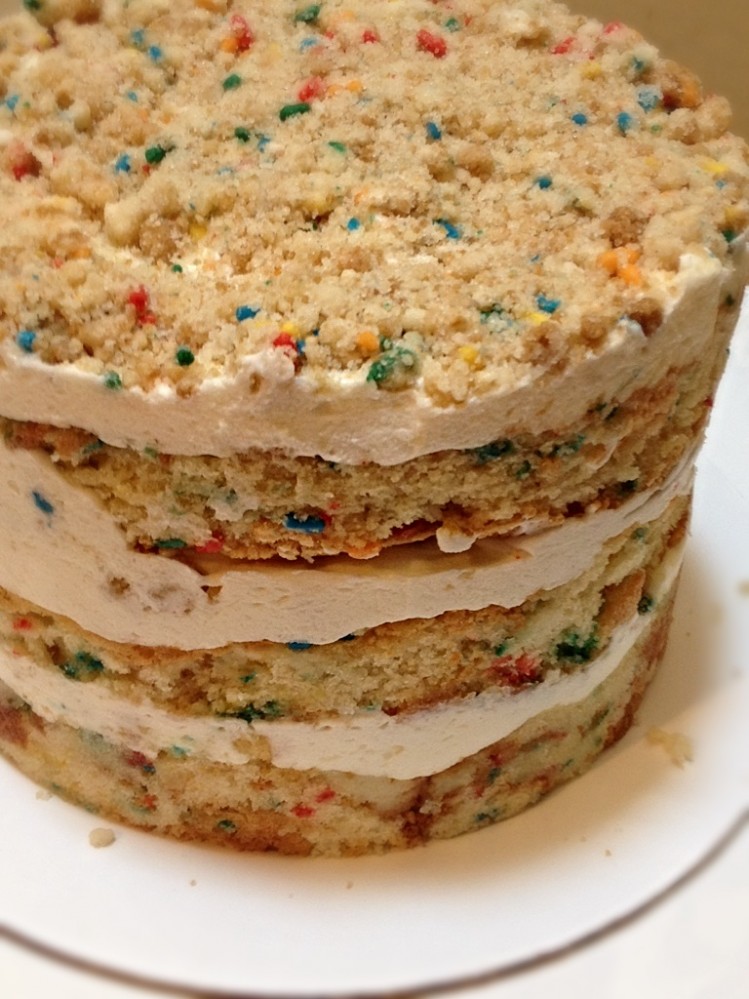
Birthday Layer Cake
Makes 1 (6-inch) layer cake, 5 to 6 inches tall.
Serves 6 to 8
The Cake
makes 1 quarter sheet pan
55 g butter, at room temperature (4 tablespoons, 1/2 stick)
60 g vegetable shortening (1/3 cup)
250 g granulated sugar (1 1/4 cups)
50 g light brown sugar (3 tbsp. tightly packed)
3 eggs, room temperature
110 g buttermilk (½ cup)
65 g grapeseed oil (1/3 cup) (I used vegetable oil and it tasted fine)
8 g clear vanilla extract (2 tsp.)
245 g cake flour (2 cups)
6 g baking powder (1 ½ tsp.)
3 g kosher salt (¾ tsp.)
50 g rainbow sprinkles (1/4 cup) (in the batter)
25 g rainbow sprinkles (2 tbsp.) (extra on top)
Preheat oven to 350°F. Combine the butter, shortening, and sugars in the bowl of a stand mixer fitted with the paddle attachment and cream together on medium-high for 2 to 3 minutes. Scrape down the sides of the bowl before you add the eggs. Mix on medium-high for 2 to 3 minutes and scrape down the sides of the bowl once more. On low speed, slowly add buttermilk, oil, and vanilla. Increase the speed of the mixer to medium-high and mix for 4-6 minutes, until the mixture is practically white, twice the size of your original mixture. Scrape down the sides of the bowl. On low speed, add the cake flour, baking powder, salt, and the in the batter rainbow sprinkles. Mix for approximately a minute, until it comes together. Scrape down the sides of the bowl.
Line a quarter sheet pan with parchment and butter. Pour the cake batter onto the sheet pan using a spatula make it even. Sprinkle the extra sprinkles on top of the batter.
Bake the cake for 30-35 minutes. The cake will double in size and remain dense. At 30 minutes, poke the edge of the cake with your finger. If it bounces back slightly and the center does not jiggle, it will be done.
Take the cake out of the oven and cool on a wire rack. Store the cooled cake in the fridge, wrapped in plastic wrap, for up to five day.
The Soak
55 g milk (¼ cup)
4 g clear vanilla extract (1 tsp.)
Whisk together the milk and vanilla in a small bowl.
The Frosting
makes about 2 cups
115 g butter, at room temperature (8 tbsp/ 1 stick)
50 g vegetable shortening (¼ cup)
55 g cream cheese (2 oz.)
25 g glucose (1 tbsp. (I omitted and did not taste a difference)
18 g corn syrup (1 tbsp.)
12 g clear vanilla extract (1 tbsp.)
200 g confectioners’ sugar (1 ¼cups)
2 g kosher salt (½ teaspoon)
.25 g baking powder (pinch)
.25 g citric acid (pinch) (I omitted)
Combine butter, shortening, and cream cheese in the bowl of a stand mixer fitted with the paddle attachment. Cream the ingredients together for 2-3 minutes on medium-high, until the mixture is smooth and fluffy. Scrape down the sides of the bowl. Put the mixer on low, stream in the glucose, corn syrup, and vanilla. Put the mixer onto medium high and beat for 2-3 minutes, until the mixture is glossy white and smooth. Scrape down the sides of the bowl. With the mixer on low, add the confectioners’ sugar, salt, baking powder, and citric acid. Bring back the speed to medium-high and beat for 2-3 minutes. Use the frosting right away or store in an airtight container in the fridge for up to a week.
The Crumb
makes about 2 ¼ cups
100 g granulated sugar (½ cup)
25 g light brown sugar (1 ½ tbsp. tightly packed)
90 g cake flour (¾cup)
2 g baking powder (½ tsp.)
2 g kosher salt (½ tsp.)
20 g rainbow sprinkles (2 tbsp.)
40 g grapeseed oil (¼ cup) (I used vegetable oil)
12 g clear vanilla extract (1 tbsp.)
Preheat the oven to 300°F. Combine all of the ingredients but the oil and vanilla in a stand mixer fitted with the paddle attachment and mix on low speed until combined. Add the oil and vanilla on low to have the ingredients form small clusters. Place the clusters onto a cookie sheet lined with parchment. Bake for 20 minutes. Allow the crumbs to cool and store in an airtight container. It will stay fresh for 1 week at room temperature or 1 month in the fridge or freezer.
Put it together
Put a piece of parchment paper lined cookie tray on a counter. Peel off the parchment paper from the bottom of the cake by inverting it. Use the cake ring to stamp out 2 circles from the cake. Place cake ring on parchment paper lined cookie tray along with a cake collar inside the cake ring. Use the non –stamped parts of the cake to make the bottom layer of the cake. Mush the leftovers together and use the back of your hand to have them come together into one layer. Use a pastry brush to soak the bottom layer of the cake with the soak. Use a fifth of the frosting layer over the cake evenly. Place 1/3 of the crumbs over the frosting. Apply another layer of frosting (1/5) over the crumbs.
Place another cake collar in the cake ring. Place a layer of cake onto the building tower of cake. Follow the same steps from the first layer (soak, frosting, crumbs, frosting). Place the final layer of the cake onto the tower. Put the rest of the frosting onto the cake. Use the rest of the crumbs to decorate the top of the cake.
Place the cake for a minimum of 12 hours to set the cake. You can keep it in the freezer for up to two weeks.
Pull the cake out of the freezer at least three hours before you are to serve the cake. Pop the cake out of the cake ring and pull off all of the cake collars. Let the cake defrost in the fridge wrapped well in plastic for at least three hours and no more than five days. Serve the cake on a pretty cake stand.